
Starting with RUNSENSE View
-
Note: This account is an Epson Sensing ID. You do not need to create a RUNSENSE View account if you have an Epson Sensing ID for another Epson product. You can use the same ID to log in to RUNSENSE View.
- Install the Epson Run Connect app on your mobile device and start the app. The app will prompt you to set up your account.
-
Install the Epson Run Connect software on your computer. Connect the charging cradle to your computer, then place the product in the cradle. Epson Run Connect starts automatically. Click Create Account.
Note: If you have a Mac, you cannot use the Epson Run Connect software. You must install and use the Epson Run Connect app on your mobile device.
- Go to the RUNSENSE View login page and click Register Account.
- RUNSENSE – RUNSENSE View
- PULSENSE – PULSENSE View
- M-Tracer – M-Tracer View For Golf
Note: If you already created an account (Epson Sensing ID) for one of the web applications listed above, you do not need to create a new account for RUNSENSE View. You can use the same ID to log in to RUNSENSE View.
Managing Your RUNSENSE View Account
If you did not create an account after starting Run Connect the first time, go to the RUNSENSE View login page and click Register Account, then do the following:
-
Note: You do not need to create an account if you have an Epson Sensing ID for another Epson product. You can use the same ID to log in to the RUNSENSE View web application.
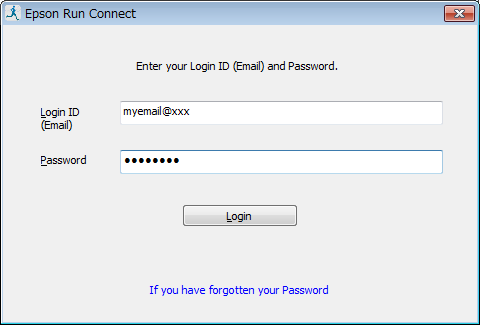
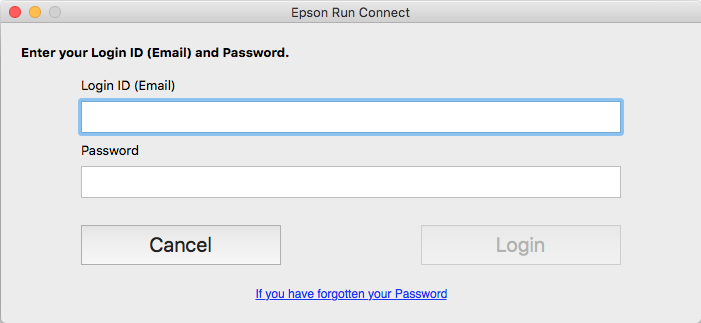
- Enter your Login ID (email address) and password in the appropriate fields.
- Click Create Account.
-
Check your email for a registration confirmation, then click the link in the email you received. You see the Confirm Epson Sensing ID Registration page.
Note: If you do not click the link within 30 minutes after receiving the email, you will need to start over.
- Enter your email address and password in the appropriate fields.
- Click Send.
Important: If you delete your RUNSENSE View account, you will also delete your Epson Sensing ID. If you delete your ID for one Epson sensing product, you will permanently delete it for all of your Epson sensing products.
- Delete all workout data from your account. You can do this in Epson Run Connect on your mobile device or RUNSENSE View on your computer.
- Go to the RUNSENSE View login page and log in to your account, if you haven’t already.
- Click
 in the upper right corner.
 - Click Account Settings.
- Click Delete Account.
Managing Workouts
- Internet Explorer 11
- Microsoft Edge
- Google Chrome
- Mozilla Firefox
- Safari
Note: When uploading several hours’ worth of data, it is best to use your computer to upload data to the RUNSENSE View web application. Uploading a large amount of data through the Epson Run Connect app can take a long time.
- Start Epson Run Connect.
- Tap Watch Data.
-
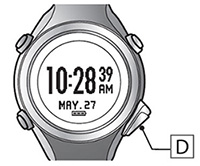
Press and hold the product’s D button on the time screen.
-
Tap OK on your mobile device.
Note: Tap Get Next Data if the button is available and you don’t see the workout you want to upload, then tap OK. Get Next Data appears only when a large number of workouts are recorded on the product.
- Tap the workout you want to upload, then tap Upload.
- Tap OK on your mobile device again.
- Press the product’s A button to end communication with the mobile device.
- Connect the charging cradle to your computer. Make sure Epson Run Connect is installed on the computer.
-
Place the product in the charging cradle. You see the Run Connect screen on your computer.
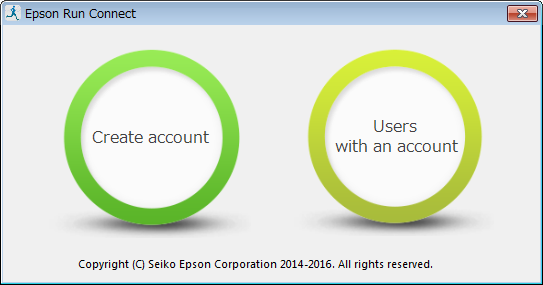
Windows
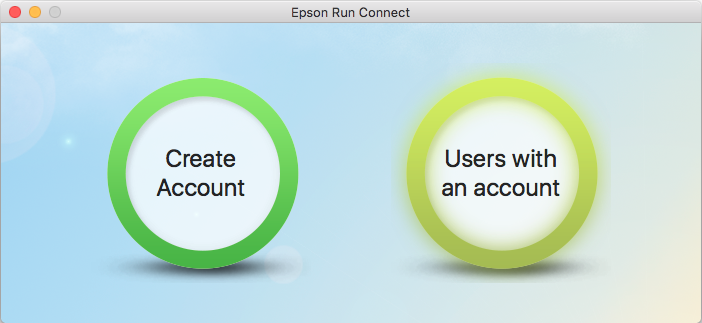
Mac -
Click Users with an account and enter your Login ID and Password.
Windows
Mac -
Do one of the following:
-
For Windows user
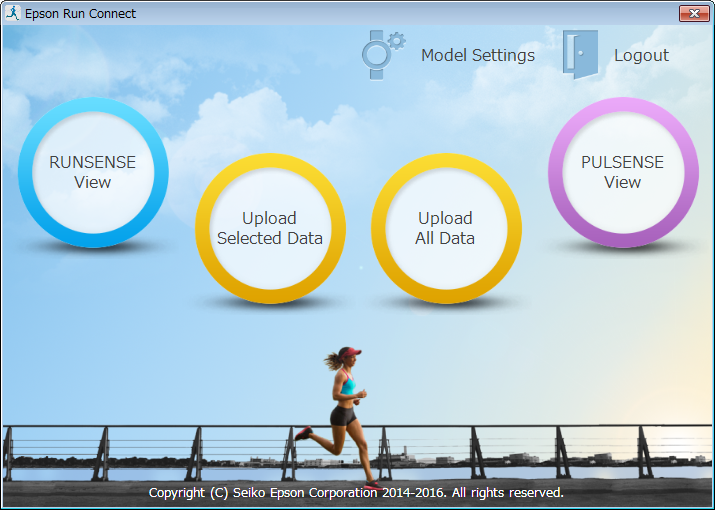
- If you want to upload all workouts recorded on the product, click Upload All Data.
- If you want to upload only some of the workouts, click Upload Selected Data. You see the Wrist Device Data List screen. Select the checkbox next to each workout you want to upload and click Upload. Then click Yes.
-
For Mac user
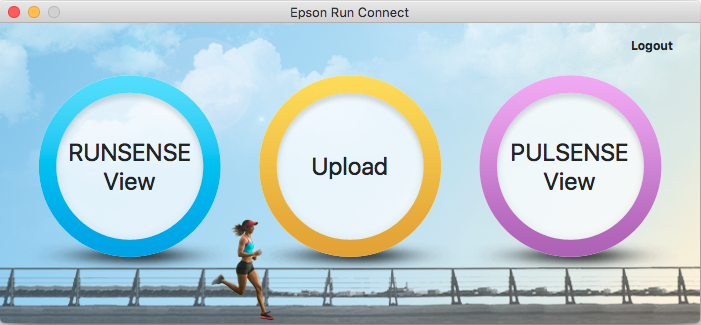
Click Upload and then upload all workouts recorded on the product.
-
For Windows user
- Start Epson Run Connect.
- Tap Dashboard.
- Scroll down and tap WORKOUT.
- Tap
 . The Delete button appears next to the workouts listed.
 - Tap the Delete button next to the workout you want to delete.
- Tap Delete.
- Log in to the RUNSENSE View web application.
- Click WORKOUT.
- Select the workout you want to delete.
- Click . A confirmation screen appears.
- Click Delete.
Note: You can export workouts only from RUNSENSE View on your computer.
- Log in to RUNSENSE View.
- Click WORKOUT.
- Select the workout you want to back up.
-
Click
 . The workout begins downloading.
Note: Make a note of the file name and save the location so you can find the workout later.
Note: You can import workouts only from RUNSENSE View on your computer.
- Log in to RUNSENSE View.
- Click WORKOUT.
-
Click
 . You see the Specify Import File screen.
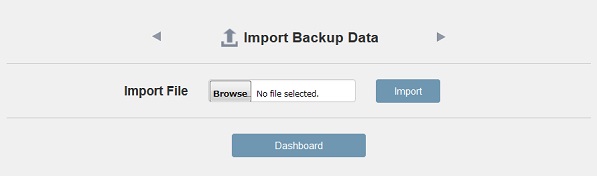
- Click Browse to locate the file.
- Click Import.
- Start Epson Run Connect.
- Tap Dashboard >
 > ADD.
 - Select activity type that you want to add.
-
Tap Add. You see the Add Workout screen.
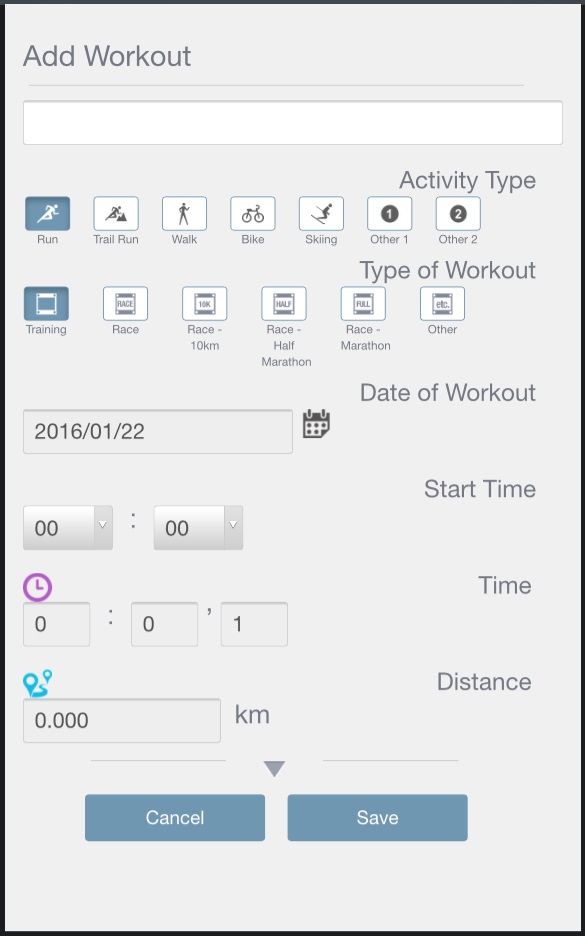
-
Enter a name for the workout and select other details from the available options.
Note: If you don’t enter a name for your workout, the workout will automatically be named “workout.”
- Click Save.
- Log in to RUNSENSE View.
- Click ADD.
-
Click Add. You see the Add Workout screen.
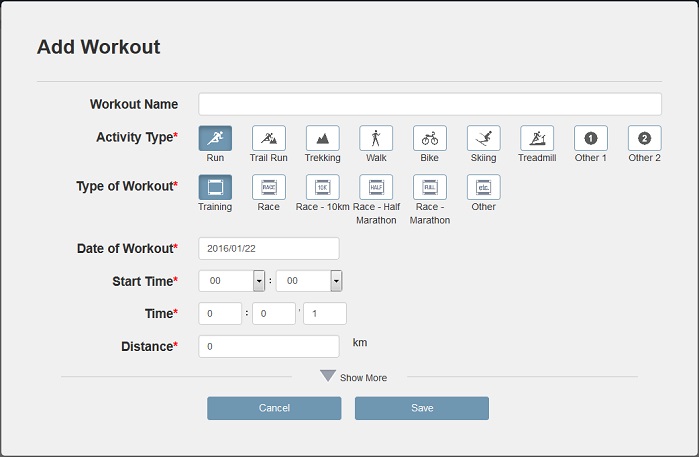
-
Enter a name for the workout and select other details from the available options.
Note: If you don’t enter a name for your workout, the workout will automatically be named “workout.”
- Click Save.
Note: You can export workouts only from RUNSENSE View on your computer.
Note: You can export workouts only from RUNSENSE View on your computer.
- Log in to RUNSENSE View web application.
- Click WORKOUT.
- Select the workout you want to export
-
Click
 . The workout begins downloading.
Note: Make a note of the file name and save the location so you can find the workout later.
- If you see
 on the Workout Details page, then only the workout’s basic data was uploaded to RUNSENSE View. You need to upload the workout’s detailed data.
 - If you selected either Skip or Indoor on the product’s GPS Locating screen at the start of your workout, then no GPS positioning took place. Your workout route was not recorded.
- If you were surrounded by tall buildings or there were obstructions overhead during your workout, the GPS signal may have been interrupted. Without a continuous GPS signal, the product cannot record your workout route.
Sharing Workouts
-
Tap or click
 on the Workout Details page. You see the Settings for sharing via SNS screen.
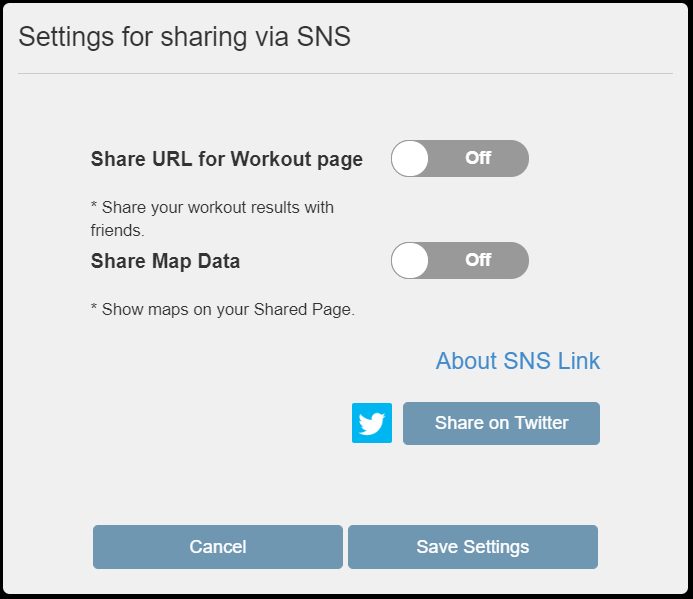
- Set the Share URL for Workout page setting to On.
- Set the Share Map Data setting to On if you'd like to also share a map of your workout.
- Tap or click Save.
Check the
Note: When you share a workout, your settings are automatically saved.
Important: Private information (such as the workout route information, title, and contents of notes) is shared on the Shared Page. Be careful when sharing private information as an unspecified number of users as well as your friends can access your Shared Page.
-
 Twitter
* For details on sharing on Twitter, see "Sharing on Twitter".
You can also check for shared workouts by looking at the list of workouts on the Workout list page in the RUNSENSE View web application. Do the following:
- Log in to RUNSENSE View.
- Click WORKOUT.
- Click
 Add Item.
 - Select the checkbox for Share Status.
- Click Save.
-
Tap or click
 or
or  on the Workout Details page. You see the Settings for sharing via SNS screen.
- Set the Share URL for Workout page setting to Off. The Share Map Data setting automatically grays out.
-
Tap or click Save.
Note: These are settings on the Shared Page in RUNSENSE View. You cannot check the shared settings for each SNS service in RUNSENSE View. Make sure you check the settings in each service.
Sharing on Twitter
-
Click theicon on the Workout Details page.
-
To share your workout details, set Share URL for Workout page to ON.
If you want to share route information on the map, set Share Map Data to ON. - Tap or click "Share on Twitter".
-
Check the comment you want to share, and then tap or click the Tweet button.
Note: If you are not logged in to Twitter, fields for entering your Login ID and Password are displayed along with the comments field.
See the Twitter Help for details on changing the Twitter sharing settings.
Linking to Other Apps
Note: If you upload a workout directly to the app, the workout will not automatically upload to RUNSENSE View, even if the app is linked to your account.
- Create an account in the app you want to link to, if you haven't already.
- Log in to RUNSENSE View, then click and select
 Linked App List. If you're using a mobile device, start Epson Run Connect, then tap Dashboard > > Linked App List.
 - Click or tap the Allow button next to the app you want to link. If you are not logged in to the app, a login page appears.
- Log in to the app, if you haven't already. An authorization page for linking your RUNSENSE View account and the app appears.
- Click or tap Authorize or Allow.
- Your RUNSENSE View account and the app are now linked. When you upload workouts to RUNSENSE View through Epson Run Connect, the workouts automatically upload to the app as well.
- Log in to RUNSENSE View, then click and select Linked App List. If you're using a mobile device, start Epson Run Connect, then tap Dashboard > > Linked App List.
- Click or tap the Synchronize button next to the linked app.
The workouts in RUNSENSE View upload to the app.
Click or tap the Update Sync. Status button to update the synchronization status of that app.
- Log in to RUNSENSE View, then click and select Linked App List. If you're using a mobile device, start Epson Run Connect, then tap Dashboard > > Linked App List.
- Click or tap the Settings button for the app. When the Data Link Settings screen appears, set Auto Synchronize when Uploading to Off.
- Log in to RUNSENSE View, then click and select Linked App List. If you're using a mobile device, start Epson Run Connect, then tap Dashboard > > Linked App List.
- Click or tap the Settings button for the app. When the Data Link Settings screen appears, set Share on Linked Applications to On.
About the Epson Global ID
See the Epson Global ID Help page for more details.
https://auth.cp.epson.com/account/help
https://auth.cp.epson.com/account/help/#migration
Others
-
If the wrist band is loose, you see a screen like this:
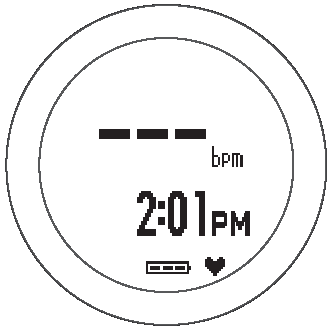
Try the following:- Make sure the product does not touch the bone on your wrist.
- Tighten the wrist band, but do not wear the product too tight.
-
If your body or the ambient temperature is too cold, you see a screen like this:
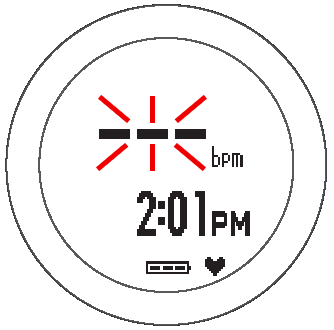
Try the following:- Protect the device by wearing it under a sleeve in cold or windy conditions.